Half-Round Gutter Miter Templates: Cut It Right the First Time
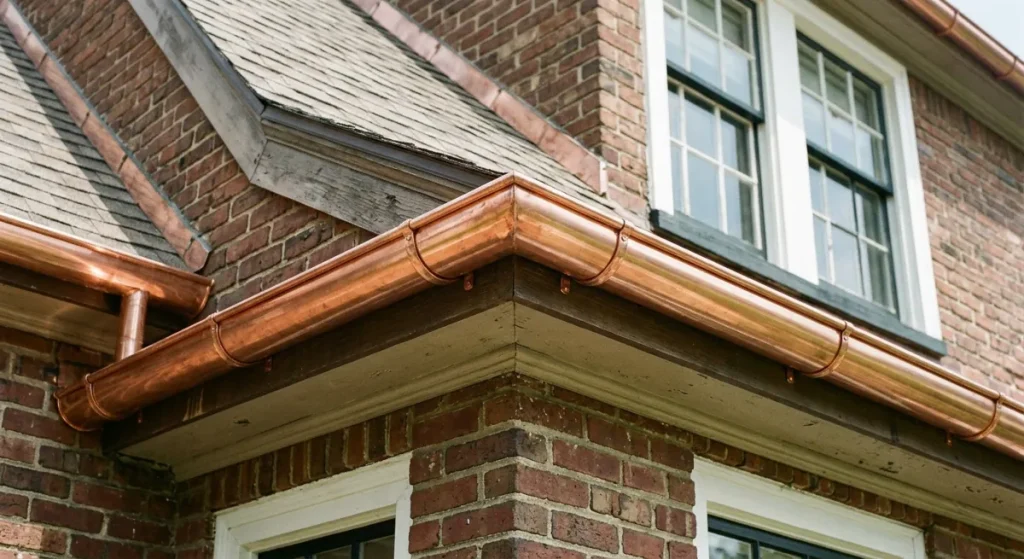
If you have ever cut a half-round gutter miter freehand and watched it gap at the joint, you already know what this kit solves. The curved cross-section of a half-round gutter profile is geometrically unforgiving — a scribing error that would pass unnoticed on a K-style flat face creates a compound gap on a half-round joint that no amount of sealant will reliably bridge through a full freeze-thaw cycle.
After 31 years of production gutter installation and high-end copper restoration work, I built the Miter Master Kit to eliminate that problem permanently. Six precision-engineered PDF templates, calibrated to 300 DPI architectural scale, designed specifically for the 6-inch half-round gutter profile used in high-end residential builds and historical restoration projects.
Why Half-Round Gutter Miters Fail Without a Precision Template
The failure mechanism is straightforward. A half-round gutter miter requires the cut face to follow the full curved geometry of the profile — both the flat bottom and the curved sidewall — at the exact angle required by the corner. Any deviation from that geometry creates a gap that runs across the full curve of the joint face.
On a 90-degree inside corner, a 2-degree scribing error produces a visible gap at the peak of the curve. On a 22.5-degree bay window miter, the same error produces a gap that cannot be corrected without recut.
The three failure points I see consistently in the field on half-round gutter miter work:
- Freehand scribing drift — even experienced installers lose geometry when scribing directly onto the metal without a fixed template reference
- Web-image printing distortion — images pulled from a browser and printed at home are not true scale. WordPress, Chrome, and most home printers rescale images automatically, compromising the geometry before the template touches the metal
- Wrong angle on bay window corners — the correct cut for a standard residential bay window is 22.5 degrees. Anything else will fail within two to three seasons on a half-round gutter profile
What Is Included in the Miter Master Kit
6 High-Precision Half-round Gutter Miter Templates
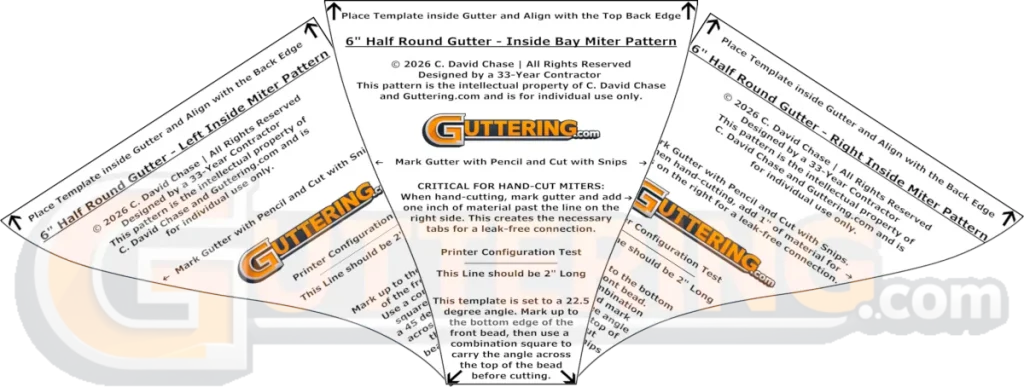
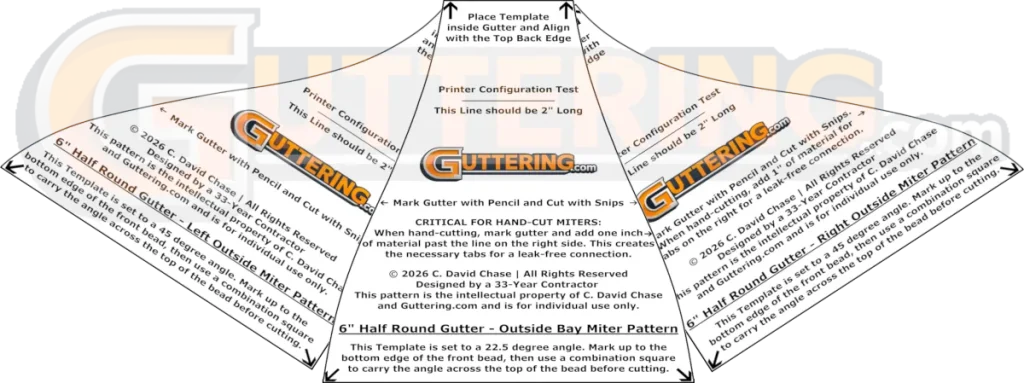
All six templates are calibrated specifically for the 6-inch half-round gutter profile and delivered as a 300 DPI PDF — the only file format that locks architectural geometry to a fixed, printer-independent scale. Every template includes registration marks and a 1-inch calibration square so you can verify true scale output before marking a single piece of metal.
| Template | Type | Application |
|---|---|---|
| 90° Inside Miter — Left | Standard Inside Corner | Standard wall corners |
| 90° Inside Miter — Right | Standard Inside Corner | Standard wall corners |
| 90° Outside Miter — Left | Standard Outside Corner | Standard wall corners |
| 90° Outside Miter — Right | Standard Outside Corner | Standard wall corners |
| 22.5° Bay Miter — Inside | Bay Window Inside Corner | Bay window wraps |
| 22.5° Bay Miter — Outside | Bay Window Outside Corner | Bay window wraps |
The Grandaddy Field Guide
The templates get you the cut. The field guide keeps the money in your pocket. This is not a generic instruction sheet — it is a condensed set of field-tested techniques pulled from 31 years of production half-round gutter installation work.
- The Calibration Page — a dedicated printer verification page with a 1″ × 1″ check square to confirm true scale output before you mark any metal
- The 1-Inch Tab Rule — the specific overlap dimension for half-round gutter miter joints that ensures a full mechanical seat before sealant is applied
- The Notching Secret — a field technique for relieving the miter tab so the joint seats cleanly without distorting the gutter profile
- The $500 Measuring Trap — the layout math error specific to half-round hanger spacing that causes short runs and wasted material on long copper installations
- The Scrap-to-Gold Method — how to transfer the PDF template geometry onto a 12-inch scrap of aluminum or copper and fabricate a permanent metal master template that lasts the life of your career
- The Scribe and Slide Technique — a zero-waste layout method that prevents cumulative measurement drift on long half-round gutter runs
- The Seam-Seal Sequence — the exact cleaning, priming, and sealant application order for a half-round gutter miter joint that stays leak-free through years of freeze-thaw cycling
When fabricating premium architectural profiles, guessing your cuts can lead to hundreds of dollars in ruined metal. Sheet metal professionals rely on rigorous specifications, such as those found via the SMACNA Technical Standards, to guarantee flawless structural joints. We engineered our printable templates to match these strict layout tolerances exactly, saving you time and eliminating material waste on your installation.
The Bay Window Problem — And Why 22.5° Is the Correct Cut
Bay window installations are where half-round gutter work gets expensive fast. A standard residential bay window presents a 22.5-degree roofline transition at each side facet — not a 90-degree corner. Most installers either pay for custom-fabricated corners or force a free hand cut and fill the resulting gap with sealant. Neither approach holds on a half-round gutter profile through real weather exposure.
The 22.5-degree inside and outside bay miter templates in this kit give you the exact geometry to wrap a full bay window without custom fabrication. The inside corner template handles the return from the bay facet to the wall. The outside corner handles the projecting corner. Together, they produce a tighter mechanical fit and a cleaner sealant line than any field-improvised approach — in half the time and at a fraction of the custom fabrication cost.
Required Tools for Half-Round Gutter Miter Fabrication
Marking Tools
- Scribe or scratch awl — transfers template geometry onto the half-round gutter metal with a single clean line. A sharp pencil will mark fine on aluminum, a scribe is perfect for 16 oz copper
- Silver marking pencil or soapstone — essential for visibility on dark patina copper where a standard pencil line disappears entirely
Cutting Tools
- Midwest Offset Snips — When it comes to the best snips in the business, nothing touches Midwest Offset Snips—and you absolutely need both the Reds (left cuts) and Greens (right cuts) in your pouch. Their offset design lifts your hands completely clear of the metal, making them the only tools that can flawlessly track the tight, sweeping curves of a half-round profile on precision inside and outside corner miter cuts. If you try to cheat a radius cut with anything else, you’ll end up flattening the bead, dimpling the aluminum, and guaranteeing yourself a leaky corner. For a full list of the gear I carry every day like Midwest Offset Snips, check out my complete Contractor’s Toolbox.
- Straight-cut aviation snips — if you own a pair of yellow straight-cut snips, leave them in a drawer or throw them in the trash. They might seem like the logical choice for cutting a straight line, but in the gutter trade, they are completely useless. Because the blades are perfectly aligned with the handles, the metal you are cutting feeds straight back into your hands. You’ll end up fighting the aluminum, warping the material, and tearing up your knuckles in the process. Save yourself the frustration. Leave the yellow snips in your toolbox for minor wire-snipping duties, and stick exclusively to offset lefts (red) and rights (green) to keep your hands completely clear of the metal
For a full list of the gear I carry every day like Midwest Offset Snips, check out my complete Contractor’s Toolbox.
Sealing Materials
- Metal prep or adhesion promoter — wipe both miter faces before sealant application. Sealant applied to oxidized or oily aluminum has a significantly shorter service life on any half-round gutter joint
- Aluminum & Galvalume, use Polyurethane Guttering sealant — do not substitute silicone. Silicone does not bond reliably to aluminum under the thermal cycling a half-round gutter system experiences across four seasons
- Copper — Unless you absolutely have to, don’t ever use caulk or sealant on copper miters. Caulk is a temporary fix that will eventually break down under temperature changes, but a properly soldered joint creates a true lifetime seal that permanently fuses the metal together. If you want a copper system that lasts for decades without a drop of maintenance, leave the tubes of sealant in the truck, break out the torch, RubyFluid, and leaded solder, and solder your corners the right way.
Critical Safety Practices for Sheet Metal Fabrication
- Cut-resistant gloves are mandatory. Use Level A4 or higher ANSI-rated cut-resistant gloves any time you are handling cut half-round gutter sections. A freshly sheared copper or aluminum edge is as sharp as a box cutter blade
- Eye protection during cutting. Aviation snips can throw small metal chips during the cut stroke. Wear ANSI Z87.1-rated safety glasses — not sunglasses — any time snips are in use
- Dispose of metal scrap immediately. Cut half-round gutter scraps left on the ground or in tool bags are a consistent source of hand and foot injuries. Drop scrap directly into a metal waste container as you work
Pro Contractor Troubleshooting — Half-Round Gutter Miter Problems
The miter seats on one side but gaps on the other
This is almost always a twist in the half-round gutter run, not a template error. Before reblaming the cut, check that both gutter sections are hanging in the same rotational plane. A half-round gutter that has rotated slightly on its hanger presents a twisted face at the miter. Re-seat the hangers on the affected section and recheck the joint fit before applying sealant.
The calibration square prints slightly off
Measure the printed calibration square and calculate the percentage error. If your printer outputs the 1-inch square at 0.97 inches, your print is running at 97% scale. Adjust your PDF print settings to 103% to compensate and reprint the calibration page to verify before printing the full template set. Never skip this step on copper — the material cost does not justify the risk on a half-round gutter installation.
The sealant is skinning over before the joint is fully seated
Polyurethane sealants skin faster above 85°F on a south-facing roofline. Apply sealant to both miter faces, then immediately fit and clamp the half-round gutter joint using locking sheet metal clamps while you secure the miter through the miter tabs with pop rivets. Never use zip screws on a miter. Do not rely on hand pressure alone — thermal movement in the metal will open the joint before the sealant sets.
The copper miter is seating cleanly but the sealant is not bonding
Copper oxidizes rapidly and the oxidation layer actively resists adhesion. Before applying any sealant to a copper half-round gutter miter, wipe both faces with acetone on a clean rag, let it flash off completely, then apply adhesion promoter. This two-step surface prep is the difference between a joint that lasts years and one that delaminated by the second winter.
⚠️ Technical Warning: Do Not Cut From the Web Preview
The preview images on this page are web-optimized for screen display only and must not be used for cutting. WordPress automatically compresses, rescales, and resamples all uploaded images for faster page loading. A 1/32-inch shift in a compressed image is enough to produce a half-round gutter miter that will not seat flush. On a 20-foot or 40-foot run of copper, that is a leak point and a potential material loss of several hundred dollars. The Master 300 DPI PDF locks the geometry to a fixed, printer-independent scale regardless of browser, screen, or printer. Do not cut from a screenshot. Do not cut from a web preview. Use the PDF.
How Digital Delivery Works
This is a digital download product. There is no physical shipment.
- Complete checkout
- The 300 DPI PDF kit is delivered to your inbox immediately
- Print the calibration page first and verify the 1″ × 1″ check square before printing the full half-round gutter template set
- Follow the Grandaddy Field Guide sequence before marking any metal
You can be on the ladder with a correctly cut half-round gutter miter the same day you order.
Frequently Asked Questions
What gutter size are these templates designed for?
All six templates are engineered specifically for the 6-inch half-round gutter profile — the standard used in high-end residential and historical restoration installations.
Will these work on 5-inch half-round gutters?
No. The geometry is calibrated to the 6-inch profile. Using these templates on a 5-inch half-round gutter will produce an incorrect fit at the miter joint.
What if my printer scales the PDF automatically?
That is exactly why the kit includes a calibration page. Print it first. Measure the 1″ × 1″ check square with a ruler. If it does not measure exactly 1 inch in both directions, set your printer scaling to “Actual Size” or 100% — never “Fit to Page” — and reprint to verify before running the full half-round gutter template set.
Can I use these templates for aluminum as well as copper?
Yes. The templates work on any 6-inch half-round gutter profile regardless of material — aluminum, copper, or galvanized steel. The fabrication technique varies slightly by material but the template geometry is identical.
Is this a physical product?
No. This is a digital download. You will receive the PDF immediately after checkout with no shipping wait. The half-round gutter miter templates are ready to print the same day you order.