Why Your Half Round Miters Leak — And the 31-Year Fix
Nobody notices a gutter when it is working. The second those corners start dripping onto the flowerbeds — or running straight down the foundation wall — everybody notices. If you are searching for how to cut half round gutter miters correctly, you are already asking the right question.
Because in 31 years of production gutter installation, the single most consistent cause of a leaking half-round corner is not bad sealant. It is a bad cut. Mastering how to cut half round gutter miters cleanly is a pure geometry problem—and geometry problems have permanent, repeatable solutions.
Why Half Round Gutter Miters Fail — The Root Cause
Most homeowners treat a leaking miter as a sealant problem. They grab a tube of gutter caulk and start layering it on. That buys a few months at best. Here is what is actually happening at the joint when you attempt how to cut half round gutter miters without a precise, mechanical reference guide.
A half-round gutter profile is geometrically unforgiving. Unlike K-style, which has flat faces that can absorb a minor scribing error, the curved cross-section of a half-round profile means any angular deviation creates a compound gap. The two cut faces do not meet flush across the full curve. You end up with a stress gap — a joint that requires excessive sealant to bridge the opening — and sealant applied over a stress gap is not a seal. It is a slow-motion failure waiting for its first freeze-thaw cycle.
When aluminum expands and contracts with the temperature swings, that over-loaded sealant joint cracks. That crack is where the leak begins. The fix is not more sealant. The fix is mastering how to cut half round gutter miters so precisely that the two pieces of metal seat perfectly flush before you ever open your tube of caulk or heat up your solder.
How to Cut Half Round Gutter Miters — The 6-Step Professional Sequence
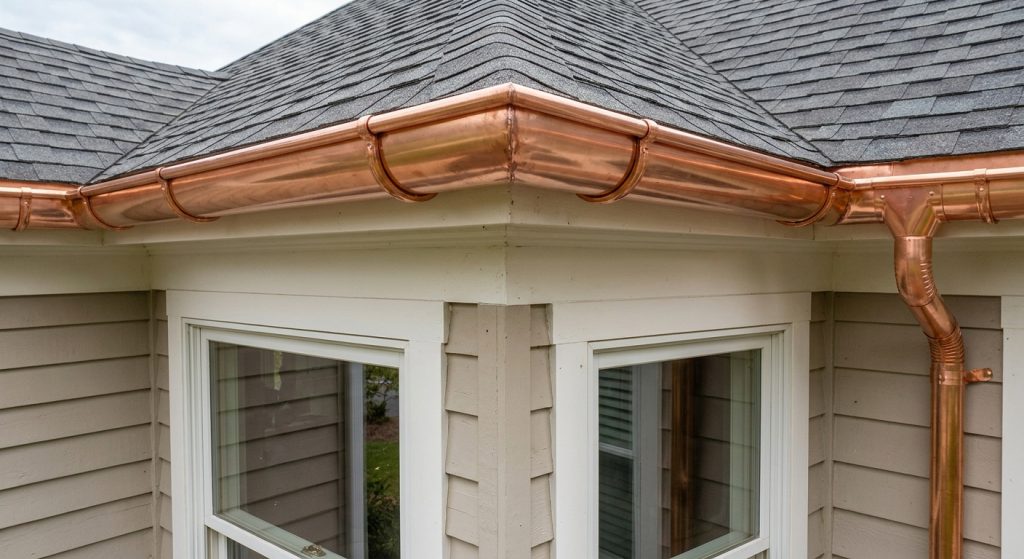
The geometry of a correct half-round miter requires the cut face to follow the full curved profile of the gutter — both the flat bottom and the curved sidewall — at the exact angle required by the corner. A 90-degree inside corner, a 90-degree outside corner, and a 22.5-degree bay window corner each require a different cut geometry when you cut gutter miters. None of them can be reliably eyeballed freehand on a ladder with a pair of snips.
- Identify the correct angle before you mark anything. Bay window corners are 22.5 degrees — not 45 degrees. Most installers default to 45 degrees when cutting half-round miters on bay windows and fill the resulting gap with sealant that fails within two seasons. Know your corner type before the template goes on the metal
- Use a fixed template reference. Transfer the cut geometry onto the metal using a template that holds the exact angle and profile shape. Freehand scribing drifts. A fixed template does not. This single step is the difference between cutting half-round gutter miters that last two seasons and ones that last twenty years
- Scribe with a carbide-tipped awl — not a pencil. A pencil line on aluminum is three to five times wider than a scribed line. That width introduces ambiguity about which edge represents true geometry when you go to cut the gutter miter. A single scribed line gives you one correct cut edge to follow with no guesswork
- Cut with offset aviation snips. Straight-cut snips distort the curved profile edge on a half-round gutter. Offset snips follow the curve cleanly and keep the cut face perpendicular to the gutter wall — which is what produces a flush miter seat after the cut
- Dress the cut edge with a flat mill file. Remove every burr before fitting. A burred edge prevents full contact at the miter seat and creates micro-gaps that sealant cannot bridge reliably through thermal cycling on any half-round gutter miter
- Prep the surface before sealant. Wipe both miter faces with a clean rag and adhesion promoter before applying any sealant. Sealant applied over oxidized or oily aluminum has a fraction of the service life of sealant applied to a properly prepped metal surface
3 Fast Troubleshooting Fixes When the Half Round Miter Will Not Seat
The joint gaps on one side but seats on the other
This is almost always a twist in the gutter run, not an error in how you cut the gutter miter. Check that both gutter sections are hanging in the same rotational plane before reblaming the cut. A half-round gutter that has rotated slightly on its hanger presents a twisted face at the miter. Re-seat the hangers on the affected section and recheck the fit before applying any sealant.
The sealant skins over before the joint is fully clamped
Polyurethane sealants skin faster above 85°F on a south-facing roofline. Apply sealant to both miter faces, then immediately fit and clamp the joint using locking sheet metal clamps and fasten the 2 sections of half round together with pop rivets through the miter tab. Pro-tip: never use zip screws in a miter. Do not rely on hand pressure alone — thermal movement in the metal will open the half-round gutter miter before the sealant sets if it is not mechanically held in place.
Copper miter seats cleanly but sealant will not bond
Copper oxidizes rapidly and the oxidation layer actively resists adhesion. Before cutting half-round miters on copper, plan for a two-step surface prep: wipe both faces with acetone on a clean rag, let it flash off completely, then apply adhesion promoter before any sealant touches the metal. This prep sequence is the difference between a joint that holds for years and one that delaminated by the second winter.
4 Non-Negotiable Safety Rules Before You Pick Up the Snips
- Level A4 cut-resistant gloves — mandatory, not optional. A freshly sheared aluminum or copper edge is as sharp as a box cutter blade. Standard work gloves provide no meaningful protection when handling cut gutter miter sections. A single careless grab can result in a deep laceration across the palm
- ANSI Z87.1 safety glasses during all cutting operations. Aviation snips throw small metal chips and burr fragments during every cut stroke. Sunglasses are not a substitute for rated eye protection on any sheet metal job
- File every cut edge before handling bare-handed. Fifteen seconds with a flat mill file eliminates the primary laceration risk during fitting and test-fitting of half-round gutter miter sections. Do not skip this step under any time pressure
- Dispose of metal scrap immediately into a metal waste container. Cut gutter miter scraps left on staging planks, on the ground, or in tool bags are a consistent source of hand and foot injuries on every job site. Drop scrap directly into a metal container as you work
The Professional Shortcut — Stop Scribing Freehand
For three decades I ran a custom set of steel miter templates on every half-round job. I clamped them onto the gutter, scribed the line, and cut the gutter miters in one clean pass. It did not matter if I was tired, in a rush, or working in the rain — the cut was always correct because the geometry was fixed in the template, not dependent on my hand position at that moment.
When I built Guttering.com, making that template set available was the first thing I did. If you want to know how to cut half round gutter miters the way a 31-year professional does it, this is the tool that makes it repeatable.
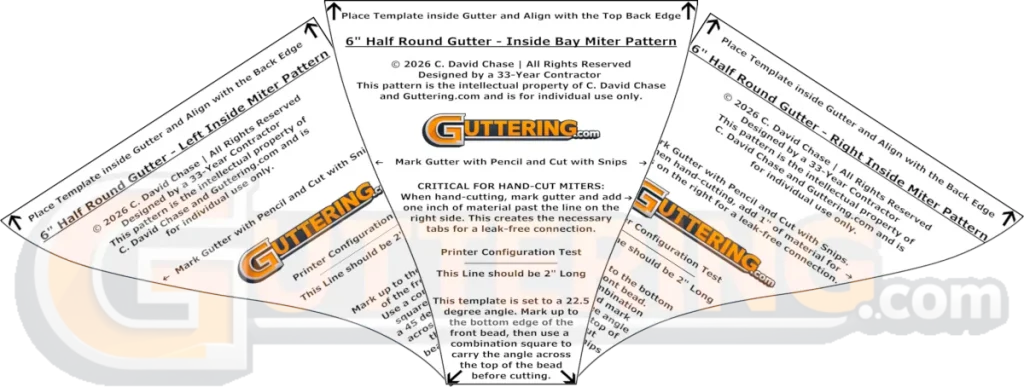
👉 Field-Tested Recommendation: The Miter Master Kit includes six 300 DPI precision PDF templates covering every corner type you will encounter when cutting half-round gutter miters on a residential installation — 90-degree inside and outside corners and 22.5-degree bay window corners, left and right hand patterns for each. The Grandaddy Field Guide is included with the 1-Inch Tab Rule, the Notching Secret, and the Seam-Seal Sequence that keeps joints leak-free through 30 winters. Instant digital download — print and cut the same day you order. Stop guessing on expensive copper and aluminum corners.
Learning the trade secrets of How to Cut Half Round Gutter Miters used to take years of trial and error on the job site. The Miter Master Kit completely solves the layout geometry for you in a matter of seconds so you can execute flawless, leak-free corners on your very first try.
SHOP THE 6 INCH HALF ROUND GUTTER MASTER MITER KIT — The Definitive Blueprint on How to Cut Half Round Gutter Miters.
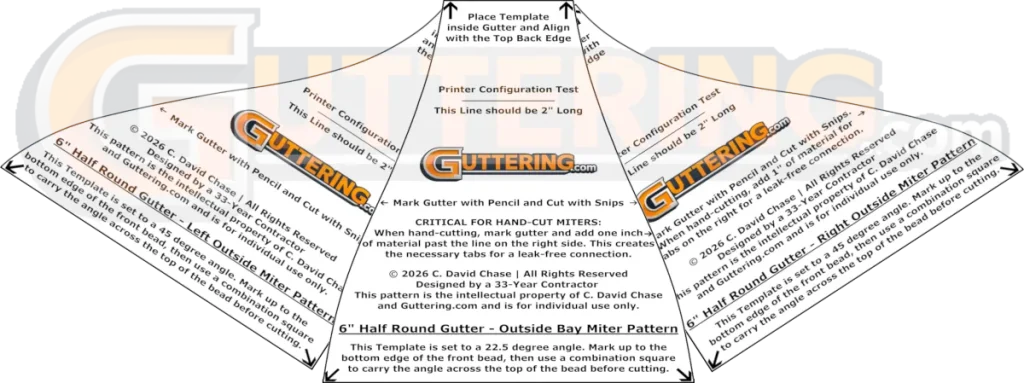
⚠️ Technical Warning: Do Not Cut From the Web Preview Images
Before you look at the diagram previews below, a quick word of warning regarding How to Cut Half Round Gutter Miters using online graphics: do not layout your cuts from a screenshot or a web image. WordPress automatically compresses and rescales every graphic to speed up page loading. A shift of just 1/32 of an inch during that web compression is enough to ruin the radius and keep the joint from seating flush. On a long run of heavy copper, a mismatched seam is an immediate leak point and a loss of hundreds of dollars in material.
The master 300 DPI PDF locks the geometry to a fixed, unchangeable scale regardless of your browser. Bypass the web previews, print out the file, and ensure your cuts are dead-on accurate.
Mastering how to cut half round gutter miters correctly is what separates a professional-grade installation from one that leaks by the third season. Now that you have the full cutting sequence, the troubleshooting fixes, and the safety protocol, head over to the guttering tools page for the complete field-tested kit — offset snips, rivet gun, Geocel sealant, and every other item I used in production work for 31 years. Every item on that page earned its place through real job site conditions, not a product spec sheet.
Pro-Tip: Always solder your miters on copper half round guttering—never rely on temporary caulk or sealants for a high-end metal installation. Unlike standard aluminum run-outs, heavy-gauge copper requires strict adherence to thermal expansion calculations. According to the structural data maintained by the Copper Development Association (CDA), a continuous copper gutter run can shift significantly across seasonal temperature swings, meaning any restriction at the corners will inevitably stress the solder joints and lead to structural failure.
As an Amazon Associate, I earn from qualifying purchases at no extra cost to you.